
When it comes to replacing your old floors with heated floor system you should expect the following aspects that may be required to complete your proper heated floor installation. It may sound easier said than done to many people who do not understand how the heated flooring works. Below we try to explain the process of the installation of the heated floor system. Please keep in mind, the older the house the harder it is to locate and run the electrical wires to the electrical panel due to structure of the building and the matereals used during building stages of the house or additions (for example if your walls are concrete or centre block bases it will be harder to run the wire for thermostat in your wall and all the way to the basement where electrical panel is usually located. You will be advised of the difficulties durin your estimation to give you a better idea on the time and cost for your specifict project.)
Main Level or Upper Level Heated Floors
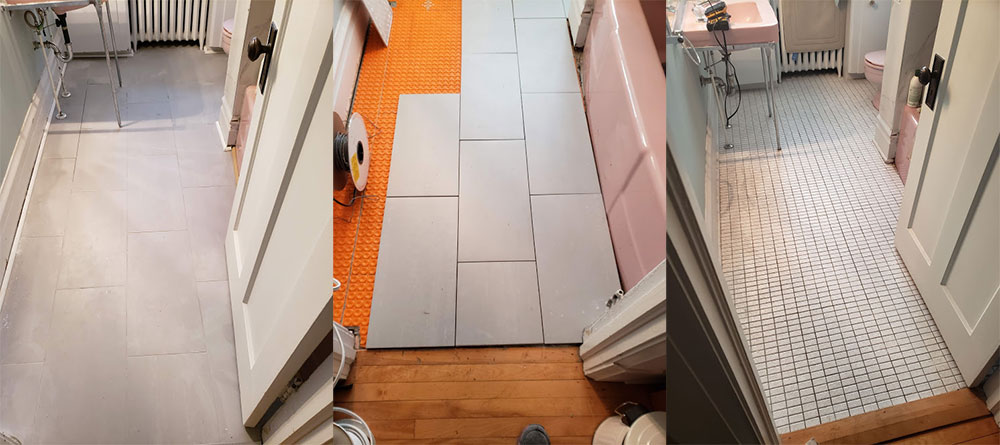
If you have an existing linoleum, vinyl tiles or any other tiles that usually are being installed over glue or mortar there are a few extra steps in preparation required.
New tiles and Ditra membrane have to be installed on the new and leveled plywood sub-floor. Once your old tiles are removed it is nearly impossible to remove the remaining mortar from the original sub-floor. In this case your old sub-floor will have to be replaced with new material in order to properly install your heated floor. Your old sub-floor has to be cut out from the area where the old tiles have been removed and installed.
Once the old sub-floor is removed the new plywood will need to be cut out to size to replace the old. After, the installer will be required to properly screw the new sub-floor to the joists in order to keep the floor even and prevent from the future cracks in your tiles. Depending on the complexity of the old material it may take extra day or two to prepare the sub-floor properly for the installation of your new heated floors.
Once your sub-floor is all done it is time to start laying down a membrane and install DITRA-HEAT cables before tile installation.
Please be prepared for a 24 hour wait to give time for mortar to dry between the membrane and sub-floor. After your tiles are installed give another 24 hours for the mortar to dry. After grout is done, please give another 24 hours to dry.
Basement Floors
If you are planning to install a heated floor in your basement bathroom it is very important to think through what are you planning to do with the rest of the basement floors in the future. If your basement is not finished you may want to think what materials will be used for the rest of the floor in order to keep same heights between the floors.
It is possible to install heated floors over concrete or install it over insulated sub-floor panels which will give an extra height to your heated floor and may not align with the rest of the flooring in your basement.
Please be prepared for a 24 hour wait to give time for mortar to dry between the membrane and sub-floor. After your tiles are installed give another 24 hours for the mortar to dry. After grout is done, please give another 24 hours to dry.
DITRA-HEAT Thermoastat and Electrical Connection
Every DITRA-HEAT floor installation requires its own circuit. During your new floor installation it will be required to run a dedicated line directly to your electrical panel. You will need a new breaker to be installed in the electrical panel, new wires to be run through you walls to the location of the new installation. After all the wiring is done it will be connected to the DITRA-HEAT thermostat and your new DITRA-HEAT cables with heat sensor.
Thechnology these days advances faster than we can do repairs at our homes. Currently there are a few options available for the thermostat. Manually programmable, Wi-Fi Programmable and Wi-Fi Touch screen thermostats to control your new floor. Please be advised if you are pre-ordering your parts personally from the distributor or they are supplied by our team to specify what kind of thermostat you are interested in having.

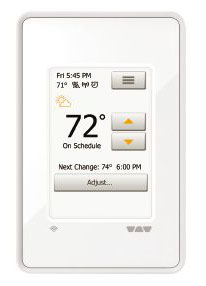
Schluter®-DITRA-HEAT-E-RSD
Programmable digital thermostat for the DITRA-HEAT system
Schluter®-DITRA-HEAT-E-RT
Programmable touchscreen thermostat for the DITRA-HEAT system
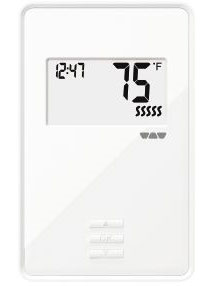
Schluter®- DITRA-HEAT-E-R
Non-programmable digital thermostat for the DITRA-HEAT system
Schluter®- DITRA-HEAT-E-WiFi
Programmable Wi-Fi thermostat for the DITRA-HEAT system
Wall Repairs
Lorem ipsum dolor sit amet, consectetur adipiscing elit. Ut elit tellus, luctus nec ullamcorper mattis, pulvinar dapibus leo.
Toilet and Sink
Lorem ipsum dolor sit amet, consectetur adipiscing elit. Ut elit tellus, luctus nec ullamcorper mattis, pulvinar dapibus leo.
DITRA-HEAT Heated Floors
Combine the beauty and durability of stone, tile, or resilient floor coverings (WPC, LVT, LVP, etc.,) with the comfort of an electric floor warming system to bring a touch of luxury into any room of the home. DITRA-HEAT is the only electric floor warming system that directly incorporates uncoupling technology to ensure that floors aren’t susceptible to cracked tiles and grout. Cables can be placed wherever heat is desired for customized heating zones, and no leveling compounds are required, which makes for a quick and easy installation.
With the proven technology of our DITRA uncoupling membrane incorporated in the design, DITRA-HEAT provides the ideal solution for bringing comfort and floor warming to any tiled floor.
Required Products For Proper Installation
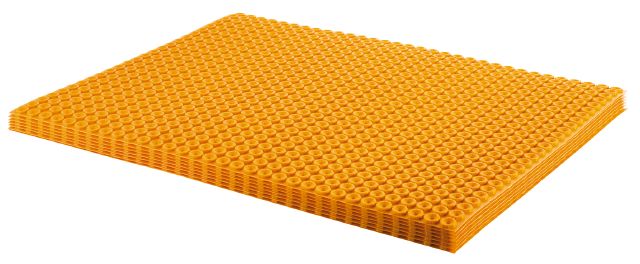
DITRA-HEAT MEMBRANE
Schluter®-DITRA-HEAT integrates customizable, comfortable electric floor warming with the functions associated with DITRA: uncoupling, waterproofing, vapor management, and support to ensure a long lasting installation.
- The stud structure of DITRA-HEAT is specifically designed to allow for the easy installation of DITRA-HEAT-E-HK heating cables
- Nominal 1/4″ (5.5 mm) thickness minimizes tile assembly thickness and reduces transitions to lower surface coverings
- Self-leveling compounds are not required to encapsulate the cables into the membrane
- Available by the roll or by the sheet to accommodate various room sizes
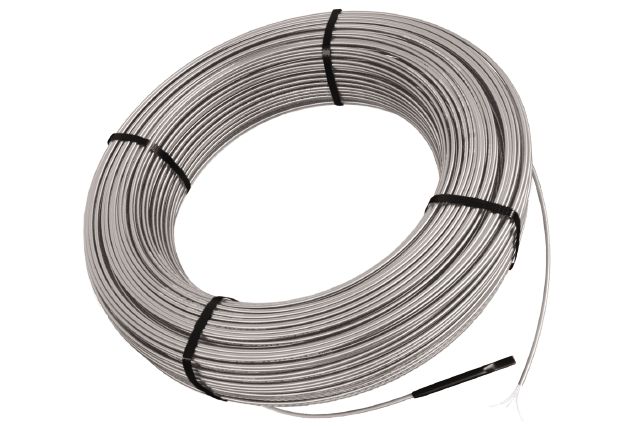
DITRA-HEAT twisted pair heating cables
- Schluter®-DITRA-HEAT-E-HK are twisted pair heating cables designed for integration with the DITRA-HEAT uncoupling membrane in interior floor warming applications.
- Cables snap into the membrane; clips and fasteners are not required
- No self-levelers required to encapsulate the cables; installation time significantly reduced
- No return to thermostat required
- Produces virtually zero electromagnetic fields
- 120 V and 240 V options available in a variety of lengths
- Provides electric floor warming for use beneath tile, stone, or other resilient floor coverings (e.g. LVT)
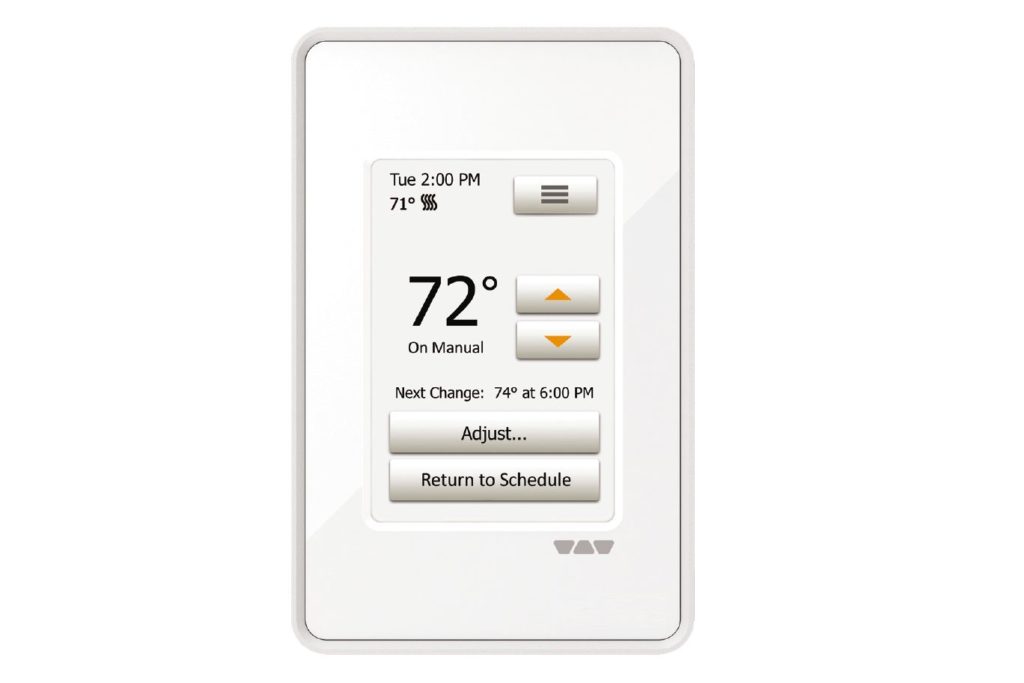
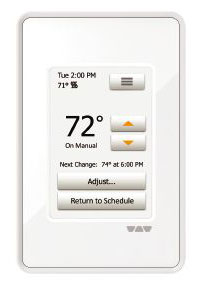
Schluter®-DITRA-HEAT-E-RT
Schluter®-DITRA-HEAT-E-RT is a programmable touchscreen thermostat used to control DITRA-HEAT-E-HK heating cables.
- 3.5” intuitive touchscreen display
- 6 programming periods per day
- Ability to track and log power consumption
- Set-up wizard
- QR code for quick access to system settings
- Supports 120 V and 240 V cables
- 5 mA built-in GFCI
- Floor temperature sensor included
- Sleek design, available in bright white

Electrical Breaker
A dedicated circuit is required for DITRA-HEAT. You will require an empty space or an unused breaker in your electrical panel to connect you heated floor.
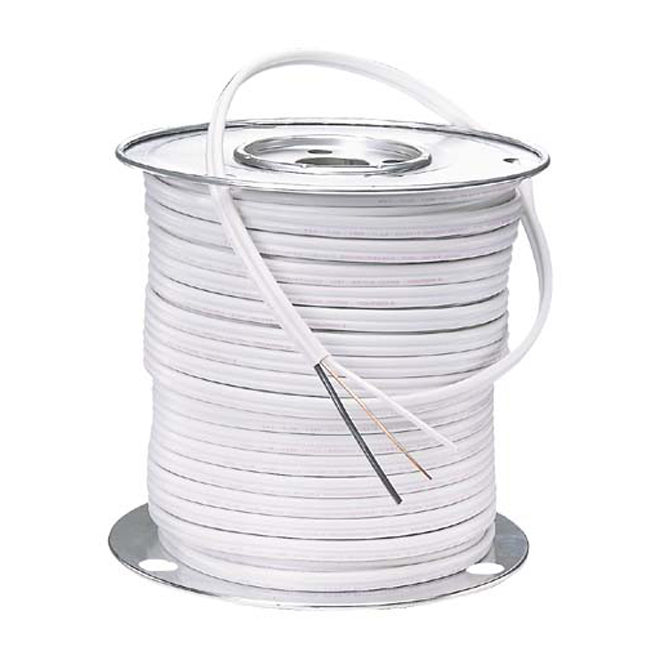
Electrical Cable
Depending on the location of your new heated floor and location of the electrical panel you will need a new line ran to connect Ditra cable to the Breaker.
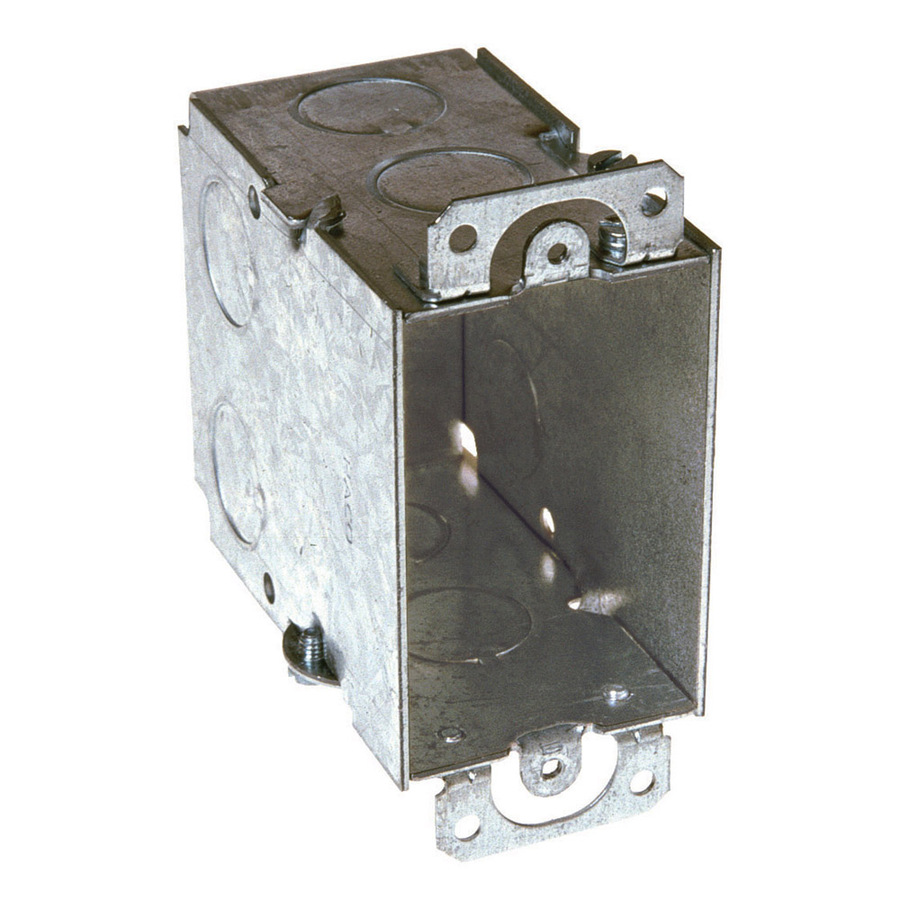
Gang Box
You will need a new Gang Box which is slighly deeper than a regular electrical box because you will need extra space to accomodate Ditra thermostat depth.
Past Projects
Error fetching portfolio projects…
bathroom-renovations floor-tiles flooring heated-floors “>
50 sq. ft. Bathroom Floor Renovation (Heated Floor, Ditra Heat)
Request a Quote